Printer configuration for Mac OSX 10.4
This is how things appear on Mac OSX 10.4. Essentially the same steps should work on earlier versions of Mac OSX.
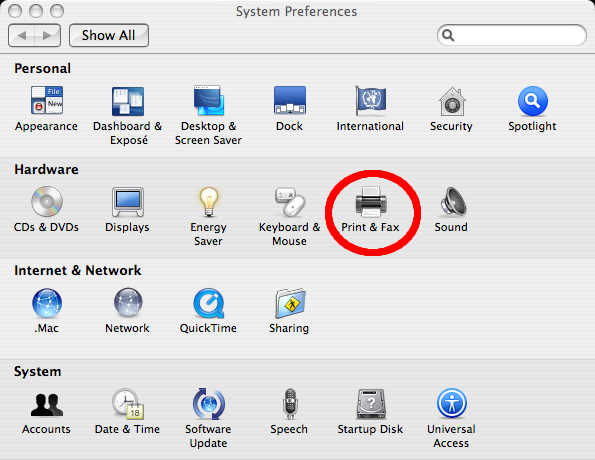
Start up System Preferences, and select Print & Fax
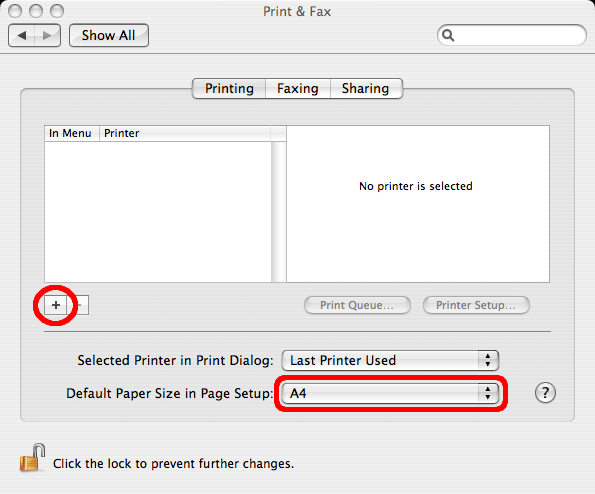
In Print & Fax select the Printing pane. Since most of our printers default to using A4 paper, you probably want to set the Default Paper size.
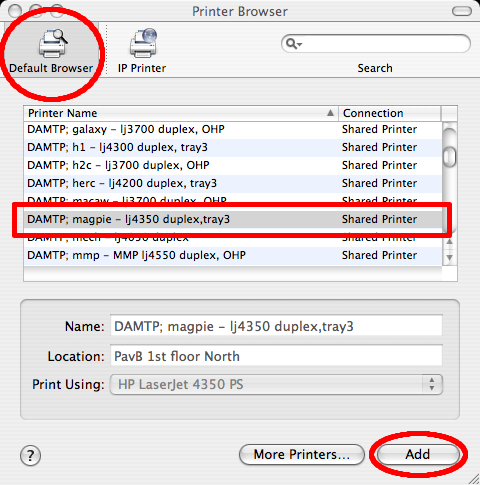
Click on the + (plus) icon, and the Print Browser will appear. Ensure that the Default Browsr is selected, and a list of available printers should appear. If you select one it will show the Name, Location and Model (Print Using) for the printer. In this example we are adding magpie which is a DAMTP printer. Finally click on Add.
Back in the Print & Fax window it should now show the added printer, with the Name etc displayed if you select a printer. To see more details of a printer select it, and click on Printer Setup.
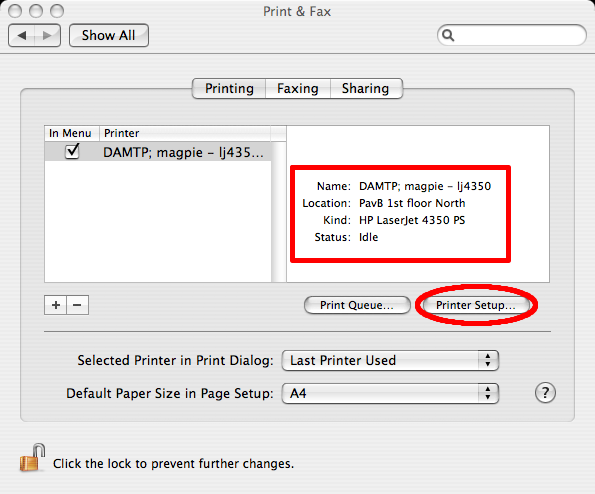
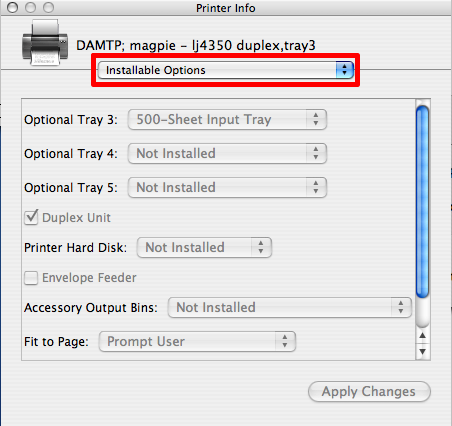
This will display a Printer Info window which shows more details including the Installable Options which can be used to tell which printers support duplexing or have extra paper trays etc.
Note that currently any printers which don't say which department they belong to are owned by DPMMS. This may be changed at some point.